Painter

Kids Ceiling Fans

Can you Paint Popcorn Ceilings

Can it be done? Yes!

I was quite surprised, and she said she had read that you can’t paint these ceilings because the stucco falls off. So to set the matter straight I figured I would research and write a blog about it. You certainly can paint “stucco” ceilings. Sure they aren’t easy, but it can be done. Another surface to decorate in your home!

Has it been previously painted?

Painting stucco ceilings is more difficult than painting regular ceilings. The stucco ends up flinging paint everywhere (much more than painting a regular ceiling) and some of the stucco itself does fall off the ceiling too. Just like painting any surface, putting paint on a stucco ceiling has some tricks to it.  Spraying the stucco is probably the easier way to do it, but sometimes that’s not practical (like if there is furniture in the room). Considering most homeowners paint their home after thy move in, painting the ceiling with a roller is the only option available.

Step one to paint stucco ceilings:

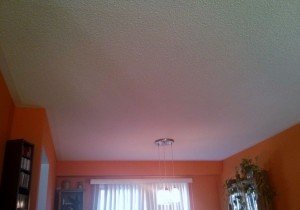
The first thing you need to do to paint stucco ceilings is to find out if it had been painted before. When painting this Pickering home shown here, we knew that the ceiling was previously painted. If it hasn’t or you don’t know, you’ll need to prime it first and prime it with an alkyd (oil based) primer.

Before painting, make sure everything is covered.

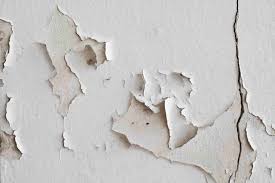
Step two is to COVER EVERYTHING! When you’re priming, if the stucco ceiling hasn’t been painted before there will be some pieces that fall off the ceiling. Don’t worry though, it won’t be enough to notice a difference in the texture, but you will want to make sure that the area is completely covered under the stucco you’re painting. If you’re not planning on painting the walls after the ceiling, you’ll need to tape plastic to the walls as well because otherwise you’ll have primer and paint splashes all over.

Paint ceiling and let it dry

Step three is to paint the primer and let it dry. If there are stains on the stucco ceiling, you might want to paint over those stains with the primer, let it dry, then prime the whole ceiling.  Be aware that it will take longer for the stucco to dry than it does walls. It takes longer because there is so much more paint on the stucco than what gets put on the walls and because there is crevices that the paint goes into and needs longer to dry. If you’re painting the walls it’s not a bad idea to cut in the first coat of the walls while you’re waiting for the stucco to dry.

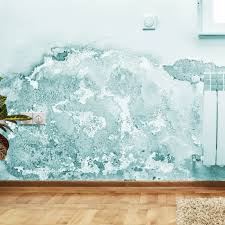
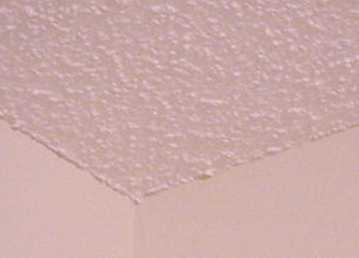
What is this bumpy stuff on my ceiling that looks like popcorn or cottage cheese?

The ceilings of many homes and apartments are not painted, but instead are coated with a substance that has a bumpy texture. It looks like this: This treatment is normally called a textured finish or an acoustic finish by builders, but most people refer to it as popcorn.

This sort of ceiling treatment is popular for several reasons:

It keeps you from having to plaster and sand the ceiling. If you’ve ever done it, you know that plastering a ceiling is no fun.

It hides lots of imperfections in the ceiling. The ceiling is a huge, flat, uninterrupted and well-lit expanse. Any imperfection is immediately obvious. The texturing hides imperfections very effectively.

It helps eliminate echo in a room. If you have ever talked in a room before and after carpeting, you know what a big difference carpet makes on echoes. An acoustic finish is like carpeting the ceiling.

There are many different ways to put a texture on a ceiling, but the most common technique involves mixing some sort of lumpy aggregate — either vermiculite or polystyrene — with ceiling paint. The mixture is then sprayed onto the ceiling using a special spray gun like the hopper texture gun from Lemmer. It goes on in one coat, and once it dries (like normal paint), you’re done!

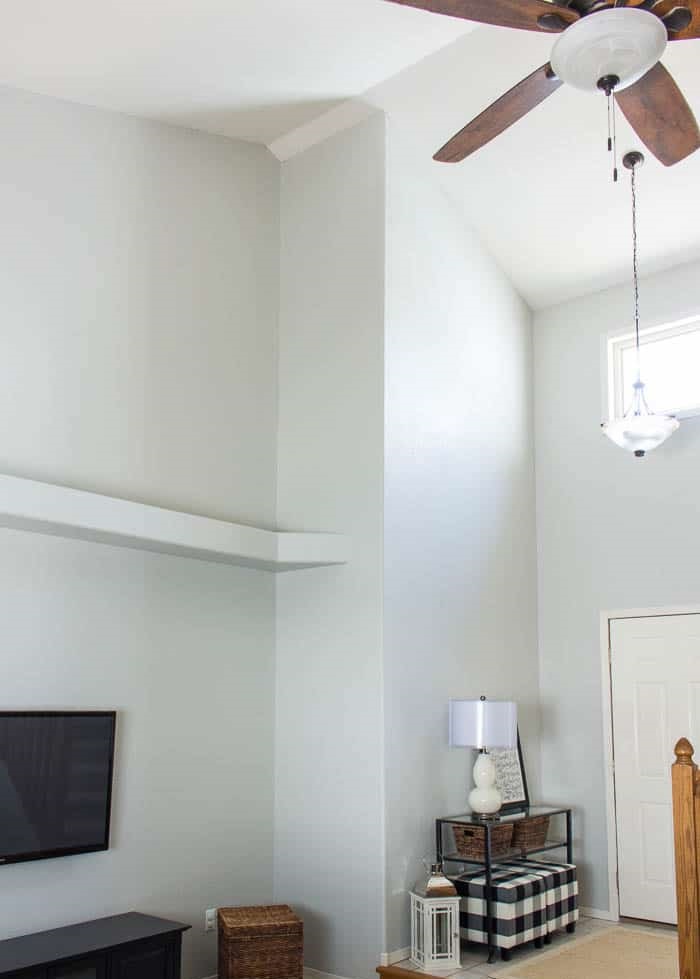
The Easiest Way To Paint Tall Walls

Our living room has always been top on my list to paint. The colors from the previous owners never jived with me — yellow mustard and the dirt brown had to go. As much as I wanted to make this rather simple DIY change to our home, the vaulted ceilings always made me hesitate. How in the heck was I ever going to reach the tip top of our 20 ft walls?! But thanks to Wagner, who supplied me with the right tools and sponsored this post, my living room now has beautiful walls that I love! If you’ve been looking for a great tutorial, this is the easiest way to paint tall walls.

As you can see, that mustard color even made it’s way into my kitchen, off the hall. I’ve never been so excited to paint in my life!

Lucky for me, I snagged all of my paint at Sherwin Williams on sale for 30% off. I purchased 5 gallons of Repose Gray, which may seem like a lot. But I only had half a gallon leftover when I finished. So I think that was just about the perfect amount of paint.

Next I gathered my painting tools. I promise you, this is exactly what you need for the easiest way to paint tall walls! This post contains affiliate links for your shopping convenience. Click here to read my full disclosure policy.

Then you will need your standard paint supplies:

paint tray

several paint brushes of varying sizes (for cutting and hard to reach areas)

paint drop cloths (to protect furniture and floors)

an extra high and sturdy ladder — mine extends to 25 ft (I bought a new one just for this job, but it will totally be used around the home in the future I’m sure!)

paint

Fundamental Painting Tips to Know Before You Pick Up a Brush

Consider the amount of light and the decorative elements in a room when . Light colors tend to open up a room, making it seem lighter and more spacious. Dark hues can add depth and warmth. Use a dark color on a single accent wall to create visual interest without making the room feel smaller. Before , pay special attention to how surrounding elements will reflect light and alter the color. For example,  might make white walls look pink.

One factor you , the degree of light reflection off the painted surface. In other words, how much the paint shines. Sheen affects the finish’s appearance, durability, and suitability for certain uses. As the amount of sheen increases, so does the enamel value, which determines the hardness or protective value of the coating. Generally, the higher the gloss, the better the finish will , abrasions, and cleaning. Choosing sheen can be a matter of personal preference, but there are some general guidelines to follow. Flat paint is widely  but is not a good choice for walls in high-traffic areas. Eggshell works well in bedrooms, , and hallways where frequent cleaning is not needed. Easier-to-wash satin or semigloss paints are good choices for bathrooms and kitchens. Use high-gloss paints for trim, cabinetry, and doors that are in perfect condition

You probably  by looking at it under a different type or intensity of light than what’s in your room. Sunlight, daylight, fluorescent light, halogen light, and incandescent light affect colors differently. So bring the sample card into the room you intend to paint and look at it several times during the day. See how the color looks using different kinds of artificial light before making a final decision. The only way to be certain about a paint color is to see it on the intended surface, surrounded by the room’s other elements. The best test is to buy sample sizes or quarts of a few colors, paint small sections of a wall, and observe during different lighting conditions. If you’re hesitant to paint your walls with samples, pick up some poster board and paint it instead. With this method, you can also see what the color looks like in different parts of your room.

Some manufacturers include calculators on their websites to help you figure out how many gallons of paint to buy. You can also use this formula: Add the widths of the walls, multiply that figure by the room’s height, then divide the total by 350 (the square footage that 1 gallon typically covers). This formula doesn’t factor in doors and windows, so you should have paint left over for touch-ups.

Don’t forget about a second coat, too! For the , you’ll want to apply a couple coats of paint. However, you might need additional coats, especially if you’re trying to cover a dark color with a lighter color. In this case, you’d want to use a primer as well.

DECORATING IN THE DARK – THINGS I’VE LEARNED FROM HAVING DARK WALLS

Every time I put up images of our house on Instagram, I trigger a chorus of questions about having dark walls. So here are some secrets of the dark side, revealed.

WON’T IT BE TOO DARK?

Yes, it will be dark. But with enough lighting, some colour pops and a mirror opposite a window to bounce light around, it will look amazing.

SHOULD I JUST DO A FEATURE WALL?

No, feature walls are for wimps. You won’t make an impact with a feature wall, go big or go home. Immersive colour is the way forward. Plus, a room immersed in dark colour makes skin tones look amazing. You’ll feel like you’re in a film.

WILL IT MARK?

Yes, it will. Be prepared to touch it up every six months. I usually go around with a sample pot and a cotton bud touching up dings and scratches.

SHOULD I PAINT THE CEILING?

In my experience, the room will look more edgy if you paint the ceiling. If you’re after a cool look, paint everything the same colour, skirting boards, doors, fireplaces. Then make sure you add lots of soft furnishings otherwise you run the risk of looking like a gastropub or a nightclub in the daytime – Eeew, sticky floors.

Things You Must Know Before Hiring A Residential Painting

Identifying Paint Problems

You’ll need to clean and prep the surface, decide what type of paint to use, and apply the paint. The best time to paint is in late spring or early fall on a dry day that is not too sunny. Temperatures below 40 degrees F and direct hot sun can ruin paint jobs. Inspect your house thoroughly before you paint, and take corrective action to prevent the root causes of paint failure. Following are tips on dealing with various paint problems.

Peeling

Peeling is often the result of painting over wet wood. It can also result from moisture within the house pushing its way out. If you cannot control the moisture with exhaust fans, use latex primer and latex paint. Latex allows some moisture to pass right through the paint.

Another cause of peeling is a dirty or a glossy surface. To undo the damage, all loose paint flakes must be scraped off with a wire brush and the surface must be sanded to smooth sharp edges. Bare spots should be primed before painting.

Alligatoring

This problem looks just like its name suggests: the hide of an alligator. Paint shrinks into individual islands, exposing the previous surface, usually because the top coat is not adhering to the paint below. Perhaps the paints are not compatible or the second coat was applied before the first coat had dried. To get rid of this problem, scrape off the old paint and then sand, prime, and repaint the surface.

CRACKING / FLAKING

The splitting of a dry paint film through at least one coat as a result of aging, which ultimately will lead to complete failure of the paint. In its early stages, the problem appears as hairline cracks; in its later stages, flaking occurs.

POSSIBLE CAUSES:
Use of lower quality paint that has inadequate adhesion and flexibility.Overthinning or overspreading the paint.Inadequate surface preparation, or applying the paint to bare wood without first applying a primer. Excessive hardening and embrittlement of alkyd paint as the paint job ages.

FOAMING / CRATERING

Formation of bubbles (foaming) and resulting small, round concave depressions (cratering) when bubbles break in a paint film, during paint application and drying.

FRAMING

Appearance of a denser colour or increased gloss where wet and dry layers overlap during paint application.

POSSIBLE CAUSES:

Failure to maintain a “wet edge” when painting. Use of a low solids “economy” paint.

Efflorescence

A problem of painted masonry construction, efflorescence is identified by crusty white salt deposits bubbling through the paint film from an underlying masonry structure. It is caused by salts in the brick or concrete dissolving with water and then leaching to the surface as the water evaporates.

Possible Causes

  • Surface preparation was poor; prior efflorescence was not entirely removed and washed before the surface was repainted.
  • Heavy moisture migrated through exterior masonry walls from inside the home.
  • Inadequately waterproofed basement walls allowed groundwater penetration.
  • Masonry was painted before the concrete or mortar had adequately cured and dried out.
  • Cracks in the masonry wall or poor tuckpointing have allowed water to get behind masonry wall.

Sagging or Running

This paint failure is easily identified as paint film with a droopy, dripping appearance. 

Possible Causes

  • Application of a coat of paint was too heavy or overloaded.
  • Paint was thinned too much at the time of application.
  • The paint was applied in poor environmental conditions, such as when temperatures were too cool or when humidity was too high.
  • The paint was applied to a high-gloss surface that was not first primed. This prevents the paint substrate from having the “tooth” necessary for the finish coat to adhere.
  • Painted surface was not clean or properly prepared at the time of application.

Rust Discoloration

This problem is characterized by rust-colored, reddish-brown to black stains on the paint surface.

Possible Causes

  • Non-corrosion-resistant nails were used to attach siding, rather than galvanized zinc-plated or stainless steel nails.
  • Steel nails have come into contact with the air.
  • Steel nails have popped up from below the surface.
  • Excessive weathering or sanding has worn away galvanized coating on nail heads.
  • Tannic acid from moist wood (e.g., oak) has reacted with steel nails, creating a black stain.

Cleaning Mildew and Chalk from Exterior Surfaces for Painting

Preparing your home’s exterior before you paint is essential. Most of the time, cleaning is straightforward, but some circumstances, like mold and mildew and chalky residue, might require some special treatment. Here are tips for battling mildew stains and ridding your home of the chalky dust.

A brown, gray, or black stain on siding or trim may be simple grime, or it may be mildew. To test whether a stain is grime or mildew, try washing the stain away with water and a detergent like Spic and Span. If the stain doesn’t wash away with water and detergent, it’s probably mildew.

Because mildew is a fungus growth, it thrives on moisture and dirt, so keep the siding open to the sun and air. Don’t store firewood or other materials close to the house. Prune tree branches that shade the house. If you have recurring mildew problems, power-wash the house’s exterior once a year and apply a mildewcide solution every two to three years.

How to Fix Dried Out Paint in a Can

You may be disappointed to open an old can of paint only to find that the paint has dried in the can. While some people may be quick to simply set the paint can out on the curb with the rest of the trash, you may surprised to know that you can fix the dried paint if it is an oil-based paint. The resulting paint won’t be the same quality as the original paint, but it will work well for touch-ups or for covering if you apply several coats. Dried latex paints cannot be fixed so they should be discarded.

Step 1

Place the open paint can on a plastic sheet to protect your work surface from paint stains.

Step 2

Pour 1 oz. of paint thinner into the paint can. Use more or less depending on the amount of paint in the can, but it is best to start with a smaller amount and work up to your desired result.

Step 3

Stir the paint thinner into the dried paint with a paint stirrer or clean stick until the paint is too thick to stir.

Step 4

Add a 1/2-oz. to 1 oz. more of the paint thinner and stir the paint well.

Step 5

Continue to add more paint thinner a 1/2-oz. at a time until you have thinned all the dried paint and achieved the desired consistency.

Exterior Painting Tips For Summer

Exterior Painting Shortcuts to Avoid

Now, most exterior painting tasks are lasting between 12-twenty five years, with respect to the quality of exterior paint. However, even using the most effective products and materials won’t insure paint warranty on the can. Listed here are key shortcuts to prevent when painting an exterior, insuring lasting beauty and defense against weathers harsh elements.

Never apply and painting materials within 24 hours of power washing: This is applicable to caulk and primer. Allowing the substrate to totally dry up from crevices and cracks, normally 24-48 hrs after power washing has had place will make sure a dry surface of these products to stick and bond to. Many occasions unscrupulous painting contractors who’re in a rush to begin and finished an exterior painting job will begin caulking and priming within 24 hours of power washing, that is a big no-no.

Don’t even think power washing replaces scraping: After power washing is finished, and completely dried out, hands scraping is essential. Power washing only removes grime and dirt, and enormous chunks of paint which has lifted up, curling. Ruthless washing will damage the wood surface, washing too near to surface, so utilizing a hands scraper may be the order of economic, as being a dental professional utilizes a tool to check on for tooth decay.

Caulking over old caulk

Aged caulk will many occasions outdoors of one or more surface substrate, otherwise both, at 90 degree angles, say where trim meets siding. Never caulk over old caulk, as this separation has happened with old caulk, and new caulk follows the identical lines of separation if old caulk is not removed. Additional time is involved, but well worth the efforts, before any exterior paint can be used.

Don’t paint over bare wood areas with finish coat paint: Bare wood can get primer much better than trim or body paint in selecting colors will. Exterior primers are created improving connecting materials within the paint than finish jackets, therefore allowing the final outcome jackets to bond to exterior primers much better than bare wood. Once all loose flaking paint remains removed, make use of a thick uniform coat of exterior primer on all bare wood surfaces.

Avoiding the prep work

  • Not pressure washing siding prior to painting
  • Not sanding walls
  • Not priming patches
  • Not masking the baseboards, molding, windows, etc.
  • Not Caulking

There’s no substitute for prep work when you’re hoping for a great final product.

Not preparing the paint properly

Paint is designed to be prepped, so make sure you do the following to make it ready to be applied to the surface:

  • Strain your paint to remove impurities and lumps
  • Thoroughly mix the paint

Using only one coat of paint

Always apply at least 2 coats for the best results.  Covering your surface in one coat will most likely result in a transparent and unflattering finish.  Applying just one more coat paint (2 total) will be your best bet to give you smooth long lasting results.

Painting without Cleaning a Surface

In order to make the paint stick properly to a surface, it needs to be clean from dust, dirt, mould and other things that may be attached. A dirty wall will lose new paint quickly, as the paint won’t be stuck to the wall, in many cases, but will be stuck to the dirt.

Once that dirt falls off, it takes the paint with it. That leaves you with a patchwork wall with a lot of unsightly holes in the paint.
Be sure to pressure wash, scrub or otherwise clean any surface you plan to paint until it is smooth and clean.

Painting over Old Paint

You can often paint over old paint if that paint is in good condition. If the paint is faded or just not the look you want anymore, but it is still intact, then it’s okay to paint over it. When you want to avoid repainting on top of old paint is when that paint is chipped, curled, peeling or otherwise damaged. That paint is going to come off over time, taking the new paint with it. Just like the dirt example we talked about above, you’ll end up with a wall that looks poorly painted after a while. It’s best to scrape off any paint that is starting to show its age and peeling or chipping. It takes time to get rid of that old coat of paint, but you’ll save yourself from having to repeat the work over again later.

How to Fix Roller Marks

If your walls look like lap lanes in a pool, you have roller marks. These occur when a brush or roller doesn’t maintain a wet edge while painting. To remedy this:

  • Start by sanding down the uneven areas until smooth
    • Patching may be necessary afterward, be careful as it may take off underlying paint
    • If severe enough, it may be easier to patch the whole area
  • Clean the dust off of the walls
  • Prime the area
  • Put a sufficient, uniform coat of paint on the wall

Preparation Guide For Residential Painting

How to Choose A Good Painter

Sure, you can ask your friends and neighbors to begin with. But, what if they do have one to recommend? Although many people simply pick a random name out of the phone book, your better of going to a website like SmartGuy.com, which lists thousands of local professionals many with ratings you can verify.

Make a plan.  Make sure you know in advance exactly what you want to paint and what color. In order to keep your costs down, you want to do it right the first time. Also, when meeting with various painters, make it clear that you want several coats, as well as the type of paint you want to use. Like most materials, there are better quality paints, and cheaper paints that won’t last as long. Emphasize the need for proper preparation and make sure all of this is in the contract you sign.

Get a few estimates. Seek a written detailed estimate from each of the painting contractors. The estimate should include a summary of labor, material costs, the number of requested coats of primer and paint, the specific brand of materials, and details of the scope of job that is to be painter.

Verify references and past jobs. Get a list of past clients from each painter and call them to see how they did, how long it took them and if they experienced any problems working with the painter. You might want to even ask them for references of a few jobs they did five years earlier to see how they are holding up

Consider reviews. Before hiring the painter, look and see if they have a BBB rating or SmartGuy rating. You can also enter their company name followed by the words “rip off” or “scam” and see if anything comes up. You might also find some information on their company at your state’s Contractors License Reference Site.

Steps To Choosing A Painting Contractor For Your Home

Choosing the right painting contractor to help you protect and beautify your home can be an overwhelming task, especially if you’ve never hired anyone to do a home improvement project before.

Explore Your Options

There’s no shortage of resources available to you when you’re trying to locate prospective painting contractors, but there’s also no guarantee that any of the random names you’ll find while searching the web or browsing through the phone book will be reputable contractors.

Get Multiple Bids

After you’ve selected a few companies that have piqued your interest it’s time to get bids.  It’s always a good idea to get multiple bids for comparison purposes.  Avoid the temptation of choosing a prospect simply because they have the lowest bid price, as that is by far the most dangerous way of selecting a contractor.  But a little healthy competition never hurt anyone and it helps to keep prices at a reasonable level.

Interview The Candidates

One of the biggest reasons why people end up dissatisfied with their contractor is that they didn’t know the right questions to ask before they made their decision.  When you meet with your contracting candidates you should treat it like a job interview

Check References

Your final act of due diligence in choosing a painting contractor is to check their references.  Any contractor worth their salt will have a complete list of references they will provide you with so you can check out their work for yourself.

Steps to Choose the Best Painter for Your House

Colours speak volumes about a person. More so when it’s for your house. Choosing the best colour code for your room or house is as important and painstaking as building the house itself. However, it’s not so tough either. It all starts with finding out the best painter or contractor for residential painting. In this article, we look at the ways in which you can choose the best painter for painting your house.

Meet Multiple Contractors

The big hoarding of a smiling painter in your neighbourhood might not necessarily be the best for you. Try to call in at least three reputable contractors and allow them to inspect your house. The more time the contractor spends in moving around the house and briefing you, the better bonding your house will have with the painter. As an added advantage, you might gain some expert knowledge about painting a house and may act as a source of information for your friends and relatives

Negotiate Early

Trust is important for getting a job done. But when trust overpowers, relationships sour. Often, contractors bid low to earn your trust, and midway to the project increases the turnaround time and cost. As a customer, you must make your expectations clear, and also responsibility in case of an exigency.

Acquaint Yourself with Paint Types

It’s true that an experienced contractor would ideally brief you with the best paint options, but, as a customer, knowing the basics of paint can make you stay one step ahead. Paint can be either latex or oil-based. Latex paint is washable and tends to last longer than oil-based paint. However, oil-based paint gives a brighter visual appeal to wooden textures. Polish or sheen is the next matter of consideration.

Get a Formal Contract Letter

An official contract letter saves you from unnecessary harassment in case anything goes wrong. A contract letter should clearly state the total cost, inclusions and exclusions in the paintwork, and all pertinent details of the contractor, like name, office and residence address, phone numbers, and license number. If possible, get a copy of the contractor’s insurance policy. It would save you from legal trouble in case a neighbour’s property gets damaged, or the painter gets hurt, due to an accident.

HOW TO CHOOSE THE RIGHT PAINTING CONTRACTOR

There is something about spring and summer that compels us to start our home projects. Better weather means we get to do the projects we’ve been putting off for months and house painting is definitely one of them. Whether you are staging your house for it to be ready in the market, painting the baby nursery, repainting the walls to hide the nicks and dings that accumulated over the years or simply wanting to get a house revamp without hurting your pockets that much, a painting project should be done by a painting professional to make sure you get the result you are aiming for. How do you get started and how do you choose the right painting contractor for your project?

Based on Yelp, are about 236 painting contractors in Chicago alone. Choosing the right one is perhaps the most important and the most difficult part of any painting job.” Who do I call?”, “What company has the essential expertise that I need to get the job done?” These are the questions that will likely come up in search of THE painting contractor that will help you complete that painting project.

Plan Your Budget

Budget is one of the most predominant factor to consider before exploring your options of painting contractors in the area. What you decide on your budget will be determined by the quality of materials you want to use, the scale of the project as well as the amount of prep work that needs to be done.

Look for Feasible Options

There is no shortage of available resources for prospecting painting contractors. Yelp, Google, Angie’s List are just a few places to start looking for painting companies near your area. Prepare a list of painting companies you may potentially hire. No matter how cliche it is, it is still better to lay down the pros and cons of each company so you will know you are making the best choice. Ask yourself what is the most important factor that you would like to consider when hiring a contractor? Is it the price? The reputation of the company? Maybe even its proximity? Don’t make the common mistake of choosing the first company that shows up on Google search, do your own due diligence on researching different companies first.

Ask the right questions

You’ve got your list of potential contractors, it’s time for you to interview them for the job. In this day and age, you can easily get in touch with them, be it by email, phone, or chat. Now, one of the reasons why clients like you end up dissatisfied with their contractor is because the right questions weren’t asked before they hired a contractor

Choosing a Painter

Using a licensed or registered painter is an important way you can ensure you won’t be ripped off. Licensed or registered painters have received special training to make sure they apply coatings to specifications,and meet industry requirements. Painters who work unlicensed or unregistered in states where they are required to do so risk the quality of the work carried out, and pose a risk to the consumer. The licensing or registration system protects the consumer and the painter from unnecessary conflict and disappointment. Consumers who use unlicensed or unqualified painters may be unable to recover damages, should a complaint over faulty workmanship arise.

In New South Wales a painter must be licensed if he/she contracts, sub-contracts or advertises to do exterior residential painting where the reasonable market cost of the labour and building materials is more than $5000.

STANDARD OF PAINTING

Coatings used are to be suitable for the relevant conditions and relevant wear and tear. Unless documented otherwise, painting is defective if it does not comply with the manufacturer’s installation instructions or AS/NZS 2311 – Guide to the painting of buildings.

INSPECTING THE PAINTWORK

Generally, variations in the surface colour, texture and finish of walls, ceilings, floors and roofs, and variations in glass and similar transparent materials are to be viewed where possible from a normal viewing position, defined as looking at a distance of 1.5 m or greater (600 mm for appliances and fixtures) with the surface or material being illuminated by ‘non-critical light’ , which is the light that strikes the surface, is diffused and is not glancing or parallel to that surface.

SURFACE FINISH OF PAINTWORK

Paintwork is defective if application defects or blemishes such as paint runs, paint sags, wrinkling, dust, bare or starved painted areas, colour variations, surface cracks, irregular and coarse brush marks, sanding marks, blistering, uniformity of gloss level and other irregularities in the surface that are visible from a normal viewing position. (Normal viewing position is 1.5 metres directly in front of surface)